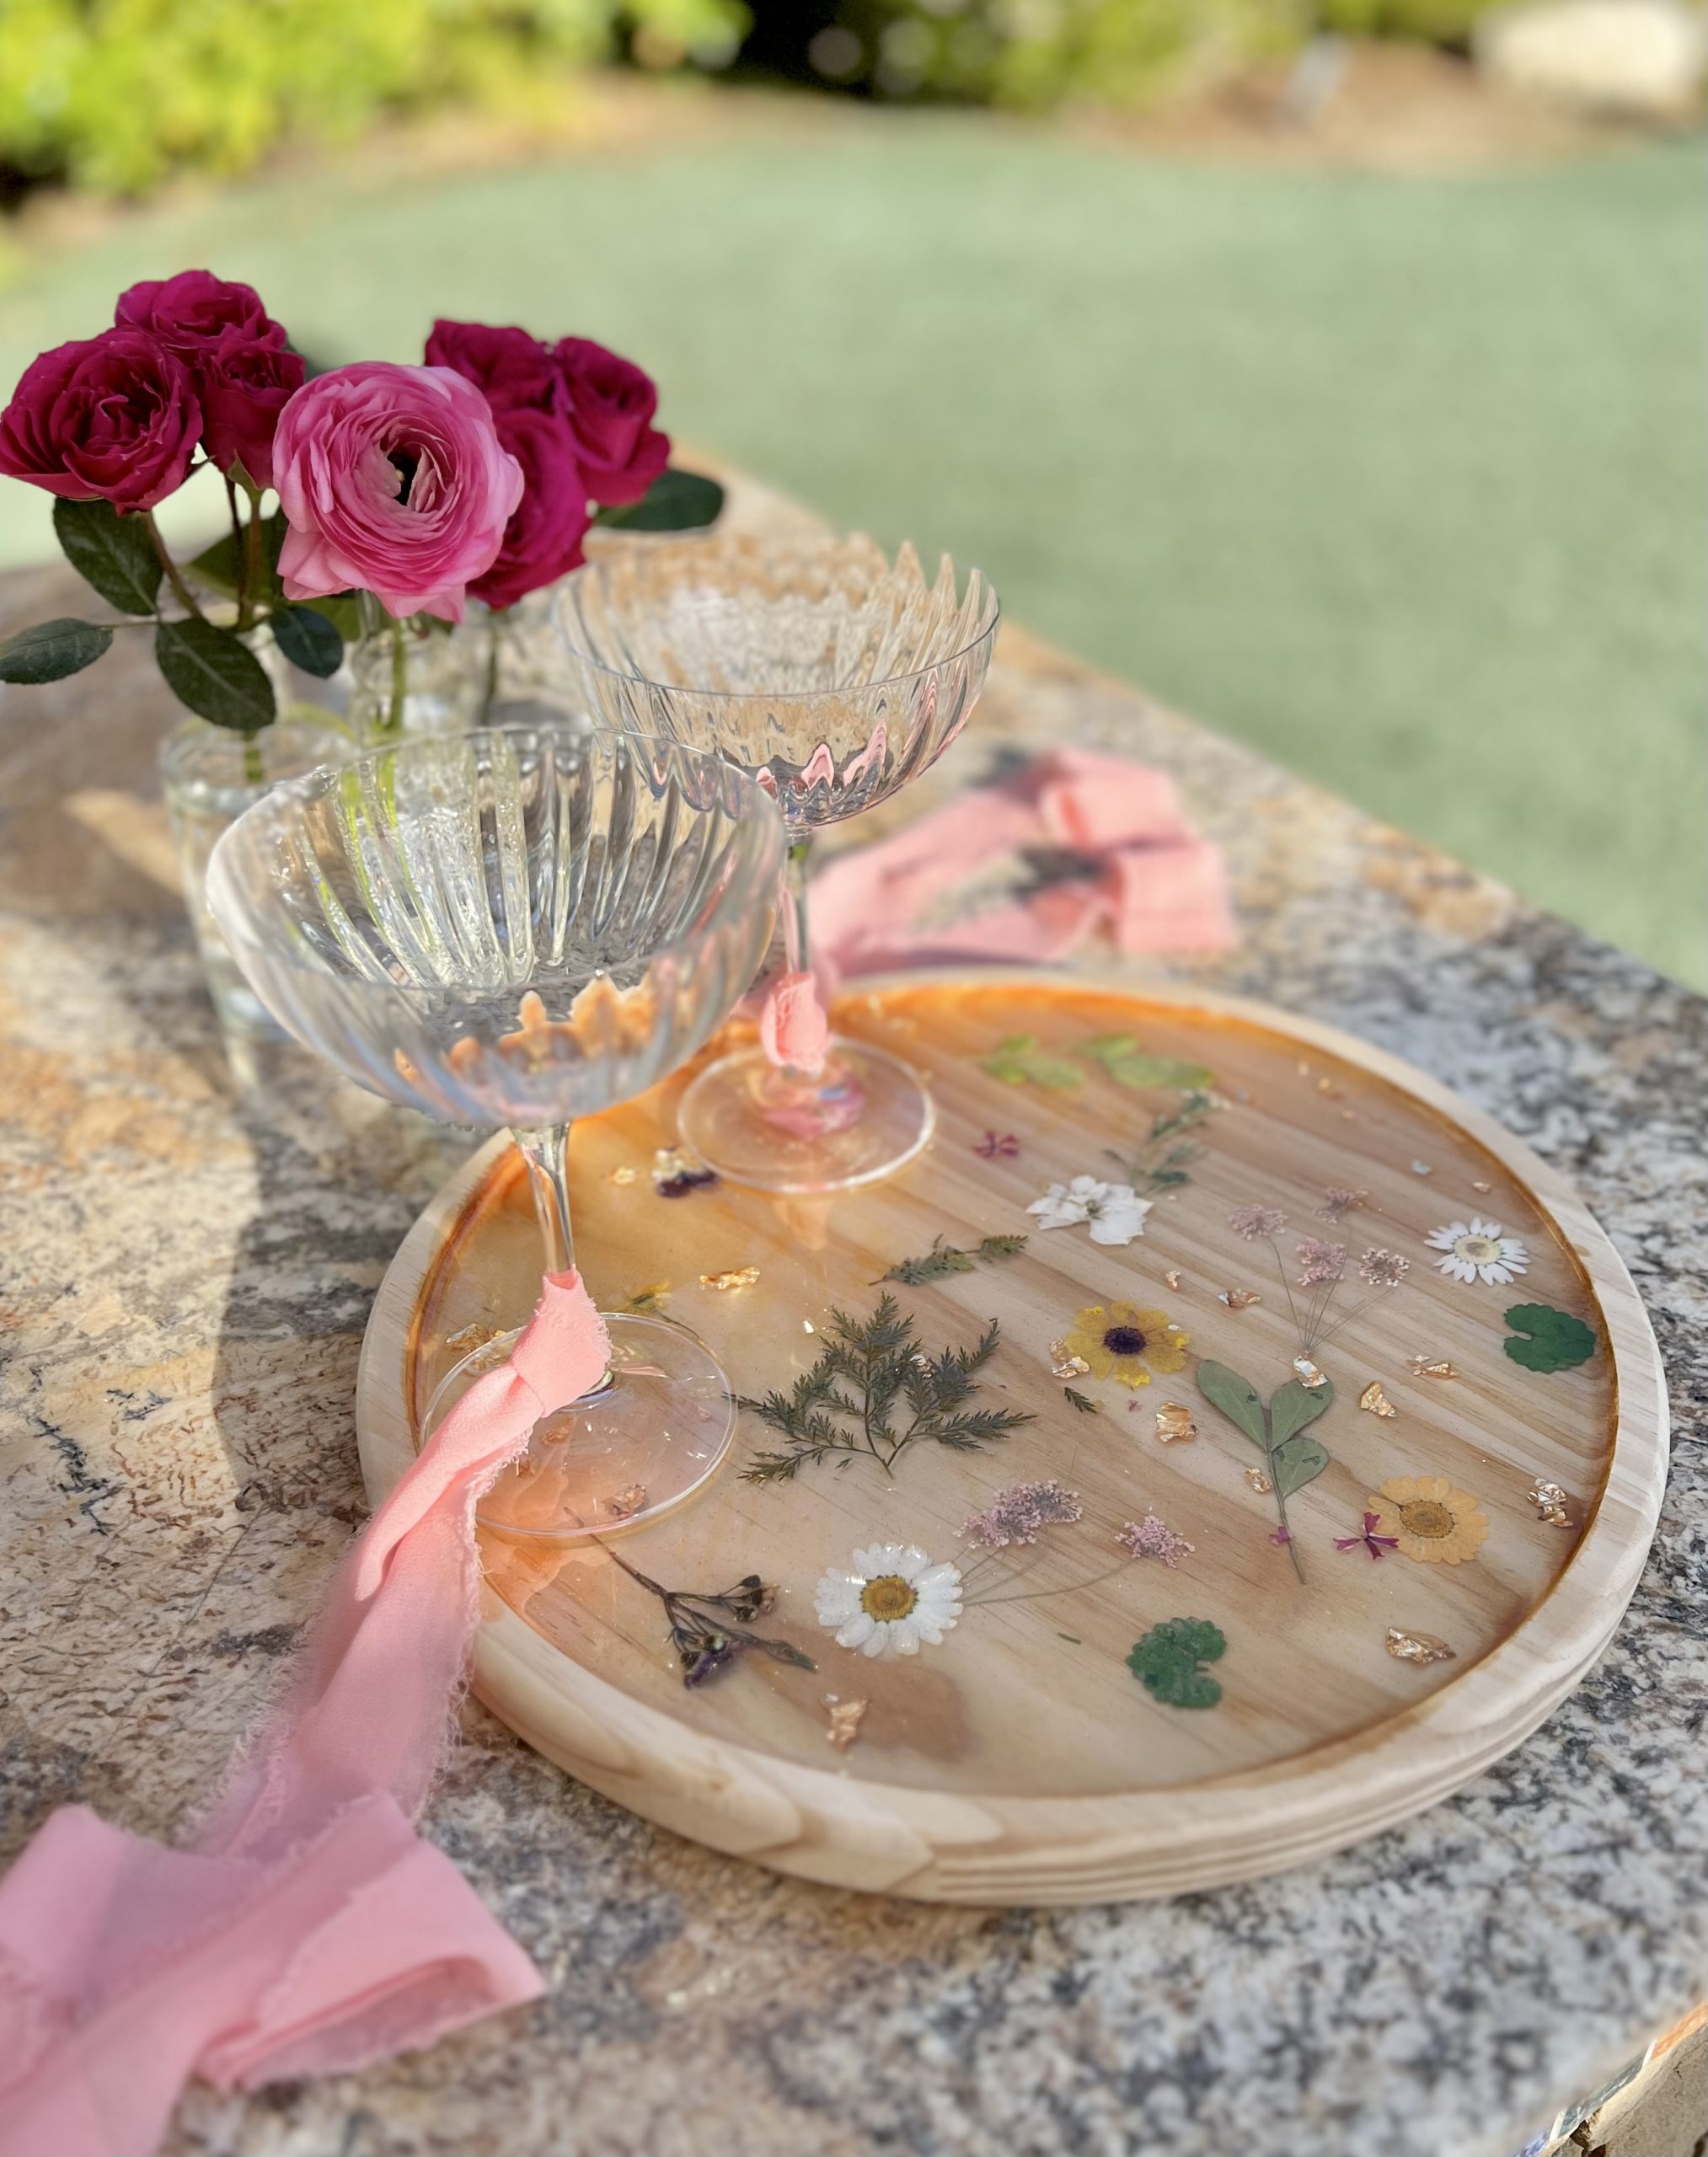
For those of you that love to craft, this is the perfect Spring time project! It even makes a beautiful gift for mom on Mother’s Day! Pressed flowers seem to be all the rage this Spring and Summer! This tray can be used to serve drinks or treats such as cupcakes! Or even hung on the wall as decor.
Discloser: Some of the links below are affiliate links. If you click through and make a purchase, I will earn a commission at no additional cost to you. See my Full Disclosure Policy here.
Materials
Here are the items you will need for this project: Resin, wood tray, dried and pressed flowers. Glitter and gold leaf are optional. Links below to what I used.
How To
Read the instructions on your resin package. It’s equal parts resin and hardener that you need to mix together. Start with at least 50ML each of resin and hardener. Stir slowly to avoid air bubbles. I typically add a small amount of glitter to my resin, but that is optional. Again slowly stir the glitter into the resin mixture. Then pour it on your tray and use a popsicle stick to push it around. If resin gets on your hands, it can get sticky and take a few hand washes to come off, so you can wear disposable gloves if you prefer.
Once you have a base layer of resin, you can gently place your pressed flowers and leaves on top. Dried, pressed flowers are very delicate and can tear easily, so be gentle with them. You can use tweezers or a toothpick to move them around and press them gently into the resin. Here, I also haded gold leaf flakes. I love the pop of shimmer it brings, but also optional.
Then you’ll make another cup of equal parts resin and harder, 50ML each, mixing slowly to avoid air bubbles. For this project, I did not add glitter to this batch. I left the resin clear. Slowly pour the resin over the tray and again push down on the flowers and leaves with a toothpick to make sure the flowers are below the resin level. You may end up needing more resin, everyones project will be different. Also depends on how much you want to fill the tray. You can always make another small amount, just be sure to keep it equal parts.
Finally, it will need to cure for 24 hours, so keep it somewhere safe where kids won’t knock it over or pets won’t pounce on it! Ha! Then you have a gorgeous, one of a kind tray! Let me know if you have any questions!
Leave a Reply